
Category Archives: Carpet Care

Seven Wand Terms Cleaning Professionals Should Know

Carpet cleaning has its own terminology.  There’s hot water extraction, low moisture extraction, spotting, “steam cleaning,” defoamers, and even digesters. But, did you know there are also terms specific to the wands used in carpet extraction?

According to Doug Berjer with CFR (Continuous Flow Recycling) carpet extractors, the following are the seven “wand” terms cleaning and carpet cleaning techs should know:

Wand: So we are all on the same page from the start, a wand is a weighted piece of equipment that attaches to a carpet extractor and is used for hot or cold water extraction.  The wand contains a vacuum head and detergent jets.  The head of the wand is called the “wand shoe.”

Wand agitation: This occurs when the wand shoe is passed back and forth over carpet pile.  The movement of the wand combined with injection of water/cleaning solution and vacuum airflow help agitate and remove carpet soils.

Proper agitation: This allows for cleaning chemicals to dwell on the carpet for a few minutes, ensuring maximum soil suspension before they are extracted out of the carpet by the wand.

Double stroking: This typically refers to a double rinse of the carpet.

Flood and flush: Also known as “chop stroking,” this is used in extreme soiling situations.  The technician pushes forward with the wand with the spray valve open and then pushes back on the wand a second time with the spray valve open; this “floods” the carpet to remove soils.  After these two steps, extraction begins.

Parallel stroking: This refers to the basic “spray forward, extract backward” use of the wand in a repeating sequence, overlapping the area cleaned.

Atomization: A high-speed, moisture controlled technology that helps agitate carpet fibers and inject and then extract water/cleaning solution from the carpet, leaving less moisture in the carpet for faster drying times.

“There’s another term we should use when describing wands and that is ‘important,’” says Berjer. “The effectiveness of the entire extraction process is dependent on many things, but chief among them is the wand.”

Cleanlink.com

Loading

5 Fast, Easy Fixes for Common Commercial Upright Vacuum Problems

Looking for ways to trouble-shoot and save money on vacuum equipment maintenance to keep your vacuum cleaner running longer?

Here are some easy, low-cost fixes for common upright vacuum cleaner problems.

Vacuum isn’t picking up dirt and particles effectively.137-Hov-C1703900

Possible fix #1: Your collection filter bag may be full, and this can reduce air flow which can cause the motor to overheat. Open the front lid/housing to see if your collection bag is full, and if it appears more than three quarters full, try replacing the collection bag with a brand new one. More than likely, the unit will resume its normal cleaning effectiveness. ($2 – $3 per bag)

Possible Fix #2: As a general rule of thumb, you should change the HEPA filter on your vacuum every 6 months, unless it appears dirty or clogged upon inspection. You can use Day Light saving time as a reminder, as it is the perfect time to change your HEPA cartridge, however, if your vacuum is not performing well this can be a proactive, preventative measure to take to ensure top performance. A clogged HEPA filter cartridge can negatively impact vacuum performance, not to mention indoor air quality. ($25)

Possible Fix #3: Check all of the hoses for a clog. What often happens is the hose and wand assembly are removed and checked/cleared, but the bottom hose that connects with the brush head is not checked. This often can be the source of the clog. The bottom hose must be removed from the back housing and straightened out. If you cannot see the brush roller through the hose, it is clogged. In most cases, you will find a paper clip or some object that has created the blockage. Once all hoses are cleared, the unit should return to its normal service. ($0)

Possible Fix #4: Check your beater bar. It is common for hair and string to get wrapped around the beater bar, which can impact the vacuum’s ability to clean. Flip the vacuum over to inspect the beater bar, and if needed, use a pair of scissors or sharp object to cut out all of the hair and string that is tangled around the bar. This will help to improve cleaning productivity. ($0)

Possible Fix #5:Check the carpet height setting. If you have recently vacuumed high-pile shag carpeting, you will need to lower the vacuum height for shorter commercial grade carpeting to ensure that you vacuum at maximum capacity. ($0)

Loading

Making the Switch to Backpack Vacuums

When choosing a set of vacuums for a company what’s the most important part? Is it the mobility, the productivity it provides, or maybe the price is the most important factor to you? What if all of these were available within the growing market of vacuums? Well there is and the answer is backpack vacuums, these vacuums have the potential to be 70 percent more efficient, with a wide range of mobility and the overall cost of repairs and the life value is estimated to be 90 percent less costly.

SSS, Speedster 1000H HEPA Backpack Vacuum

When comparing a traditional upright to a backpack vacuum the first thing you can look at is the mobility and productivity that you gain. This can be seen the best within larger facilities especially with multiple stories. The reasoning is you don’t have to stop when you finish on the first floor to go up you can just continue cleaning as you travel up the stairwell. Taking a school for example, you can start in a classroom, were you can get beneath all of the decks without needing to move any of the furniture, and then move directly to the next room or into the stairwell and onto the next floor.

This shows a big problem with traditional uprights, which is they are to big to fit under a desk or chair, so your required to move the furniture around the room taking up more time. Uprights have a very difficult time in stairwells as well due to their weight and mobility is not optimal unlike the backpack vacuums that are out of the way while you clean and all you have to worry about is the pump allowing you to travel up and down stairs with ease.

Backpack vacuums can save your company a lot of money with their expected 8 year life time compared to traditional vacuums that have a 3-4 year life time. According to Michael Jones from The Columbia Public School District will reduce overall repair costs by 90 percent.

The challenge of implementing backpack vacuums over traditional uprights is that custodians are used to and are more comfortable with their traditional vacuums. The way that you can overcome this is by personalizing the idea to your employees allow them to test out the equipment and make sure that they are on board before making a mass change. In the end to have anything be effective you have to have your employees in agreeance with your decision for it to work.

Cleanlink.com

Loading

Who Invented the Vacuum Cleaner?

cropped-ACE-Web-Banner-11There were many people who had a hand in “inventing” the vacuum cleaner. Every invention and patent has made minor improvements and has evolved into what we use today. Many people are under the assumption that H. Cecil Booth, a British engineer, was the first person to patent the vacuum cleaner in 1901.[1] The first person to patent a version of the vacuum cleaner is Daniel Hess, from West Union, Iowa, in 1860. His patent was actually called a carpet sweeper and not a vacuum.[2] This carpet sweeper had round brushes that spun around to pick up the dirt. His invention also had a detailed bellows system on top of the body to produce suction.
The first hand-powered cleaner was called the “Whirlwind” used the vacuum design and was invented in Chicago, Illinois in 1865 by Ives W. McGaffey.[3] This invention was also not motorized and used a hand crank to operate a fan to generate suction. This design was not very heavy, but was hard to operate due to the fact that you had to turn the crank while you were pushing it over the rug or floor. In 1869 he patents the “Whirlwind” and starts the American Carpet Cleaning Co.

Another person who has helped the evolution of the vacuum cleaner is H. Cecil Booth.[4] He observed a device that used a blast of air to remove the dust from the chairs on the train. Wondering if he could replicate the opposite effect, he spent some time trying different things. He wrote “I tried the experiment of sucking with my mouth against the back of a plush seat in a restaurant.”[5] He understood that he would have to come up with a way to filter the air and trap the dust. He patented his suction cleaner in 1901, but because it was so large it was carted around Britain by horses. This vacuum cleaner was made of an internal-combustion engine that used gas and did not include any brushes.[6] His invention was well received by British Royalty and this opened up the door for other inventors to try and improve the vacuum cleaner.

James Murray Spangler, an Ohio janitor, was allergic to dust and could not afford to leave his job. He decided to take matters into his own hands and tried to improve the way he swept the carpet. He used a soap box, an electric motor, a broom handle, and a pillow case as a rough design.[7] He sold one of his devices to Susan Hoover, the wife of a leather goods manufacturer, and she was really impressed with the cleaner. William, her husband decided to invest in the manufacturing of these cleaners and bought the rights from James and made him a partner in Hoover’s Electric Suction Sweeper Company.[8]

The Hoover Company opened the door for other companies like Kirby, Oreck, and Dyson. The current day vacuum cleaner design is a basic one and how it works is straightforward.When you plug in the vacuum and turn it on, it turns on the motor that is attached to a fan. As the angled fan blades rotate, air is pushed forward in the direction of the exhaust port. The air particles are forced ahead and the pressure behind the fan drops, creating suction inside the vacuum cleaner. Friction carries the debris into the vacuum bag or canister trapping the dirt. Most vacuum cleaners that are made today have brushes to loosen up the debris and makes them more effective.[9]

[1] Peter Scott, “Managing Door-to-Door Sales of Vacuum Cleaners in Interwar Britain.” Business History Review (Winter 2008). http://www.jstor.org/stable/36645109 (accessed February 2, 2011).
[2] Robert Kautzman, Patent for the Carpet sweeper. http://www.vachunter.com/galleries.htm (accessed February 4, 2011).

[3] Parker, Vacuum Cleaner, 5.

[4] Phillip M. Parker, Vacuum Cleaner: Webster’s Timeline History: 1849-2007 (New York: Icon Group, 2008), 5.

[5] Charles Panati, Extraordinary Origins of Everyday Things. (New York: Harper Collins Publishing, 1989) 138.

[6] Ibid., 139.

[7] Parker, Vacuum Cleaner, 6.

[8] Panati, Extraordinary Origins of Everyday Things, 140.

[9] HowStuffWorks, Inc. . Vacuum Cleaner diagram.

All information gathered from http://historyoftech.umwblogs.org

Loading

Six Facility Spring Cleaning Tips You Can Use

Six Facility Spring Cleaning Tips You Can Use

Springtime means storm season for most areas of the country. Spring storms can create facility challenges, such as entry-way cleanliness and safety issues, water damage, and more. To help you with these seasonal weather-related facility challenges, we’ve developed a few tips for facility managers and cleaning contractors to help ensure that your facility is clean and safe for building occupants.

1. Freshen up facility appearance: To maintain the building and to improve the appearance of your facility overall, take time to address small maintenance issues such as changing light bulbs, touching-up paint, and replacing entry-way matting.

2. Entryway Safety: Springtime brings storms and wet weather conditions which can create safety hazards for building occupants. Be sure to invest in new matting systems or clean existing matting at all building entrances and exits. Spring is also a good time to perform floor care equipment maintenance, or if appropriate, invest in new floor care equipment that will address spring cleaning challenges. For example, wet-dry vacuums or air-movers are important to keep entryways safe and dry. Additionally, make sure your facility has enough “caution wet-floor” signs to use at entrances and exits during rain and storms to minimize slips and falls.

3. Focus on flooring: Winter weather can really take a toll on your facility’s floors. Restore your hard floors and grouted tile in the spring by cleaning them with cylindrical brush floor scrubbers. When it comes to restoring carpeting, deep-clean carpets with moisture-controlled carpet extractors to bring the fabric back to its original beauty. This deep-cleaning process also helps to extend the longevity of your facility’s flooring assets, and can delay expensive replacement costs.

4. Deep-Clean Restrooms: The Spring is the perfect time to consider implementing a no-touch deep cleaning system for restrooms that effectively removes built-up soils by sanitizing all restroom surfaces and fixtures.

5. Maintain and Clean air conditioning units: To lower your energy bills and ensure the best indoor air quality (IAQ) for building occupants, facility managers should complete a comprehensive A/C coil cleaning service. Completing regular A/C coil cleaning removes dirt, grime and built-up sludge from A/C units which can improve IAQ, lower energy bills and extend the life of air conditioning units.

6. Begin Using Environmentally-friendly Products and Cleaning Practices: According to a recent Harris Interactive survey, 84% of U.S. adults prefer to do business with a company that uses environmentally-friendly products and practices. Be sure to select products that meet the requirements of the EPA’s Designed for the Environment Program (DfE) for safer chemistry, or Green Seal certified products. What’s more, businesses can implement green cleaning methods such as the use of low-moisture dilution control chemical dispensers on hard-floor automatic-scrubbers, moisture- controlled carpet extractors that reduce moisture and improve carpet drying-times, and switch to reusable mops or surface wipes to limit environmental impact.

Tips provided by CFR Corp.

Loading

QUIZ: Can You Answer These 10 Questions on Carpet Care?-CleanLink

QUIZ: Can You Answer These 10 Questions on Carpet Care?

Does your cleaning staff know the basics when it comes to carpet spotting and cleaning?

More and more cleaning professionals now include cleaning and caring for their customer’s carpets in their services. This leaves many cleaning services playing catch up, dealing with an area in which their staff may not have extensive training.

“The best way cleaning professionals can learn how to care for carpets is to take one of the many reputable courses available from many distributers and organizations,” says Joe Versluis, national sales manager for U.S. Products, a manufacturer of professional carpet and floor care equipment.

Take this true or false quiz to see how you measure up, then check your answers below.

1. There are spotters now available on the market that can adequately remove just about all types of spots on carpeting.

True
False

2. When treating a spot, cleaning professionals should start in the center of the spot and work toward the edge.

True
False

3. It is always a good idea to cover a treated spot with a clean, white cloth.

True
False

4.  There are two ways to clean carpets using the bonnet method: spray and immersion cleaning.

True
False

5.  Carpet shampooing has been replaced by encapsulation cleaning.

True
False

6.  Hot and cold water extraction are equally effective.

True
False

7.  Cleaning professional often use anti-foaming agents during the extraction process.

True
False

8.  It is no longer necessary to vacuum carpets before extraction because the extractor removes soils in the cleaning process.

True
False

9.  One of the key benefits of pre-spraying carpets before extraction is that it gives the chemicals more time to work.

True
False

10. Some carpet manufacturers require their carpets to be cleaned using the extraction method in order to avoid invalidating the carpet’s warranty.

True
False

Answers:
1.    True
2.    False
3.    True
4.    True
5.    True
6.    False
7.    True
8.    False
9.    True
10.  True

Loading

Ohh Spot! Now What? by Jason Soler, A.C.E.

Ohh Spot! Now What?

8 Simple Rules to Spot Clean Your Carpet

OHHSpot

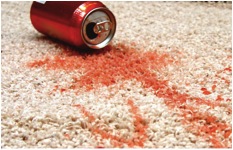
A couple Sundays ago, we had a group of friends over watching the Denver/New England  Football Playoff game and in the middle of the excitement, as the Denver Broncos scored their second touchdown, my son jumps and drops his can of soda on our brand new carpet, spilling the contents all over. 

     This scenario and other like these, happen everyday, so what can we do keep our carpets clean and stain free? Here are some easy steps:

1. Act Quickly! Most carpets available today have been treated with a stain-resisting treatments; so many spills can be removed if immediate action is taken. The longer the delay, the higher the probability of a spill becoming a permanent stain. Remember, staining is influenced by many factors, and no carpet is completely stain proof.

2. Blot liquids with a dry, white, absorbent cloth or white (no printing) paper towels.

3. Do not scrub the area! Scrubbing can cause pile distortion in the affected area. Continue to use a dry cloth or paper towels until the area is completely dry. For semi-solids, gently scrape up with a rounded spoon or a plastic putty knife. Solids should be broken up and vacuumed until completely removed.

4. Work from the edges of the spill to the center to prevent the spill from spreading. Do not scrub! Blot, absorbing as much as possible, and repeat if necessary.

5. If treating the spot chemically, identified the spot first, this will determine the chemical spotter to be used to remove the spot and follow the directions carefully.

6. As a precaution, always Pretest any spot removal agent in an inconspicuous area to make certain the solution will not damage the fiber or the dye. After applying several drops to the testing area, hold a white cloth on the wet area for 10 seconds. Examine the carpet and cloth for color transfer, color change, or damage to the carpet. If a change occurs, another cleaning solution should be selected.

  1. Avoid use of any harsh chemicals, strong cleaners or “home remedies”. There is always some risk in spot removal of damaging the textile, irreversibly altering the stained color, or otherwise ‘setting’ the stain. This is especially true if using strong chemicals, improper products or procedures. Avoid overuse or over wetting the stain as this may cause it to spread or be absorbed deeper into the carpet pile fibers or fabric. Harsh rubbing or use of cleaners with optical brighteners will result in variations in color, pile direction, or shading. These changes may remain even after stain removal or following a thorough cleaning.

8. After the spill has been completely removed, rinse the affected area thoroughly with cold water, and blot with a dry cloth until all of the solution has been removed.

Follow these 8 simple rules to keep your carpet spot free.  If you are wondering what happened to my son, well, let’s say that he spent the last quarter of the game cleaning my carpet.

Contributor,

Jason Soler, A.C.E. Director of Training

Gem Supply Co.


Loading

Ten Reasons to Have Carpets Cleaned Year Round, from CleanLink.com

Ten Reasons to Have Carpets Cleaned Year Round

As the weather warms and people head outdoors, it is important that custodial departments don’t lose sight of what needs to be done inside. There are many reasons why carpets should not be neglected. Doug Berjer product manager for CFR, manufacturers of recycling portable carpet extractors, offers these top ten reasons to have carpets cleaned year round.


Properly cleaning and maintaining carpets:

1. Prolongs the life of carpeting. Regular carpet cleaning using the extraction method can increase the life of carpets significantly, protecting your floor-covering investment.

2. Protects indoor air quality. Carpets trap airborne pollutants; however, eventually those pollutants must be removed in order to protect the carpet and maintain indoor air quality.

3. Makes carpets easier to maintain. Most carpet soiling is made up of dry soils; when carpets are kept thoroughly cleaned on a regular basis, most dry soils can be removed with regular vacuuming.

4. Removes spots and stains. As with other soils, spots and stains can attract more soiling. Removing them promptly protects carpeting from damage.

5. Prevents buildup of allergens and bacteria. Moist soiling of carpets can result in the buildup of several unhealthy contaminants.

6. Enhances the appearance of any room. Clean, well-maintained carpets speak volumes about the overall cleanliness of a home or facility.

7. Improves worker morale. Workers feel better about their work environment when it is clean. This includes the carpeting.

8. Makes carpeting look and feel clean and fresh.

9. Removes dust mites and bedbugs that may have found a home in carpets.

10. Maintains the carpet’s warranty. Most carpet warranties require that carpets be cleaned using the extraction method within a specific amount of time, usually every 12 to 18 months.


Loading

10 Steps to Faster Carpet Drying

Carpets cleaned professionally using the extraction method should dry in four to six hours. However, drying time can depend on a variety of issues, from how soiled the carpet is to how much chemical is used in cleaning. CFR’s Doug Berjer offers the following 10 steps, which are designed to help carpet cleaning technicians and professionals dry carpets faster:

  1. Vacuum carpets before extraction; this can result in less water and solution needed to clean them.
  2. If prespraying carpets, prespray in moderation, concentrating on problem and high-traffic areas; some carpet cleaning chemicals contain alcohol or petroleum that can cause carpets to stay wet longer.
  3. In the winter, turn up the heat; in summer, turn up the air-conditioning; look for ways to keep air circulating.
  4. If the room has a lot of movable contents, extract the center first and then move contents to the center of the room and extract the perimeter, placing blocks under furniture legs. Leave contents in the center of the room as long as possible to allow perimeter areas to dry.
  5. The extraction hose should be the largest diameter approved for the tool and the extractor; use the shortest length possible as air flow decreases with hose length.
  6. Avoid loops or bends in the hose.
  7. Select wands that atomize the extraction process; this minimizes the amount of water left in the carpet.
  8. Place air movers (blowers) at 45-degree angles to the floor to ensure the air blows over the carpet, not down onto the carpet.
  9. Install one air mover for every 15 feet of carpet cleaned.
  10. Select “low-amp” air movers to avoid power blowouts.

Loading